

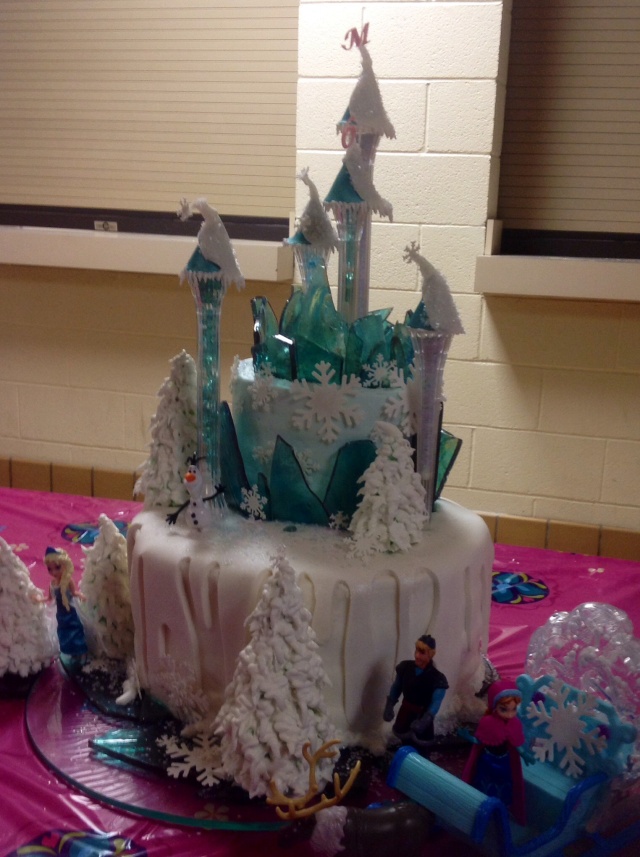
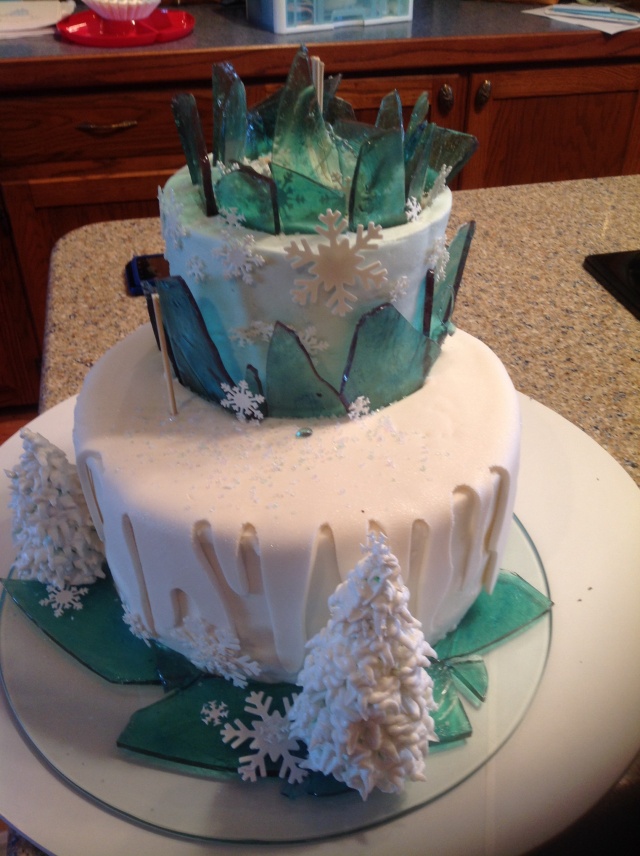
The finished product…a Frozen cake that is NOT frozen! And the figures were plastic. Sue me…I cheated and bought them. The trees are ice cream cones piped with royal icing.
Update: a followup post for the Frozen cake How To is HERE.
As you know, I’ve been in the process of creating ice and snow in my kitchen…as seen HERE and HERE.
The big day was yesterday and the birthday girl was thrilled to see her cake at last. Actually, Friday afternoon when she stopped by to deliver some things to me with her mom, she asked, “Where’s the cake?” and “Hurry up Meemaw!”. I assured her I was moving as fast as I could.
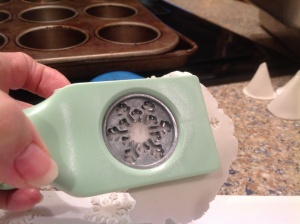
I use a scrapbooking punch to make my snowflakes out of very thin, slightly dry gumpaste. Works like a charm!!!
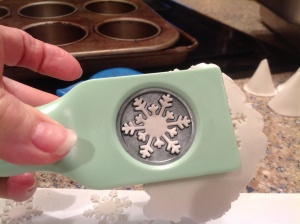
All you have to do at this point is turn the punch down and the snowflake will fall out!
The hard candy idea was a new one for me…never made the stuff. No idea why? But once I figured out that you canNOT hurry the candy… At all. Not even a little bit. PATIENCE is the key!…I had candy ICE!! My first batch came out very brown. Yeah, I hurried it. When the blue coloring was added it turned a nice olive/brown green. Not what I had in mind.
So I researched the problem on the internet, rolled up my sleeves and began again. Like my ongoing battle with fondant, I will press onward and upward!
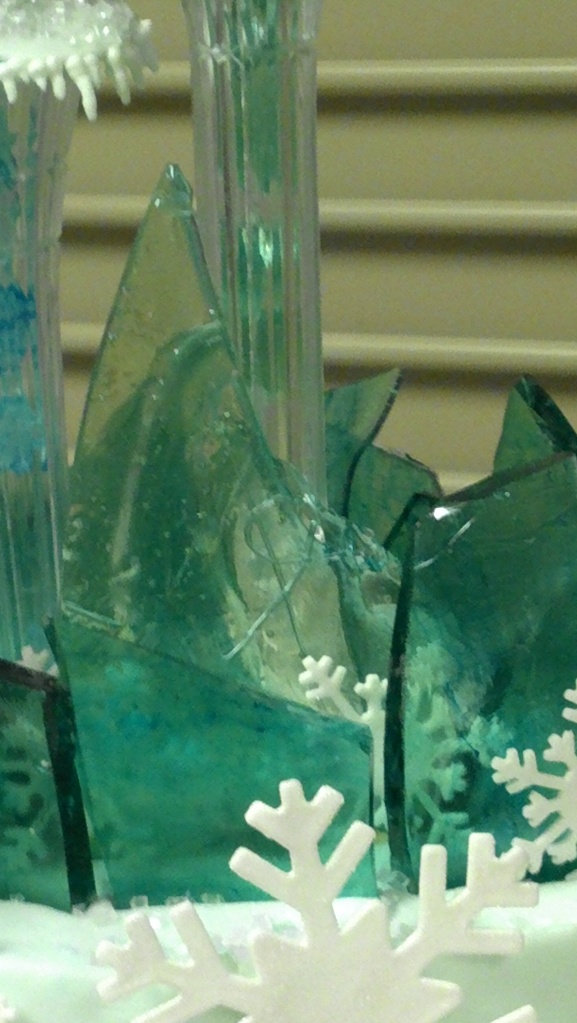
The transparency of the hard candy makes this cake design!!!
I also learned a couple of lessons concerning structure, weight, balance and cake density. I used a recipe I’ve used lots, but should have stuck with my STURDY cake as the two tiers were designed to be off center…more like steps.
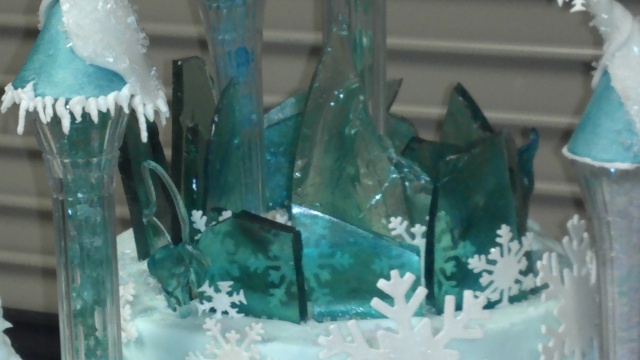
I can’t get over how much I LOVE seeing through the “ice”…
And the candy needs to be a bit thinner if it’s going to be standing upright. It also should be placed further into the center of the cake… about an inch from the outside perimeter. So if you’re using a 6″ cake, measure a little less than an inch from the edge thus forming about a 4 1/2″ circle of “ice”. An 8″ cake would be ideal for this cake stacked onto a 12″ cake.
Also, my fondant snow drifts could have been rolled a little thinner to lighten the weight load on the buttercream covered cake. And the buttercream might have not have shifted so much had I used fondant instead. Maybe.
Yeah, you’d think I’d know all of this by now. But every cake is different and I learn something new every. Single. Time!
But…new techniques were pioneered this go around and, I conquered hard candy and LOVE IT!
Not quite finished…
And I still hate fondant. There’s just no getting around it. I admit it. I am a fondant bigot.

The birthday girl ooohs and aaaahes over cake snow and ice…
One of the gals at church today thinks she wants a Frozen cake for her daughter’s birthday this summer. I think 4 1/2 months rest should recoop me. She might need to start saving $$ now though…I think about $5,000 would be a fair price for a birthday cake, don’t you? Just kidding. Maybe.


This is so beautiful!!! Great work!
LikeLike
Wow.
LikeLike
Try to stay calm. 😀
LikeLike
Seriously. Wow. Caroline was freaking out over this cake. I can see why.
LikeLike
Seriously…you too can make a Frozen cake. Directions coming up for a smaller simplified cake. Really. YOU can do it for that sweet kid!!
LikeLike
Just awesome!!! I know you are giving helpful advice to your readers, but NONE of us absoluely do not see what you consider “imperfections”! I am seeing perfection! Even the plastic characters. The birthday girl probably loves them and will have mementoes of the day! Am expecting this to become another viral post! 🙂
LikeLike
I didn’t take pics of the back for a reason! But it’s one of those learning experiences. I appreciate your opinion though!!
LikeLike
Impressive!
LikeLike
Hey..I just saw your heart pillow…you too are impressive!!!
LikeLike
I paid $50 for a plain chocolate cake with aThomas the Train face on it so charge away!
LikeLike
LOL!! If you figure your time, it’s not very profitable but I love figuring all of this stuff out! And then eat it. 🙂
LikeLike
Pingback: Frozen cake how to | Everything You Ever Wanted to Know About Country Life
This is beautiful. May I ask what you used for the clear towers?
LikeLike
Thank you Leeann and welcome to the blog. I did a followup piece on the Frozen cake here: https://therufffarm.wordpress.com/2014/01/13/frozen-cake-how-to/
If you don’t find your answer there, let me know and I’ll try to help further! Good luck!!
LikeLike
Sorry my phone was acting up so I didn’t mean to post twice. Thank you solo much. This is beaufiful
LikeLike
No problem! I did comment in more detail just a few minutes ago. Hope this helps!!!
LikeLike
I think this is beautiful. May I ask what did you use for the clear towers
LikeLike
I am making a Frozen cake this weekend. I’m thinking marshmallow topping or marshmallow fluff might make decent snowdrifts on the cake rather than fondant. Anyone have any thoughts?
LikeLike
I say go for it! I was thinking about using a fluffy cooked icing next time. Let me know how it works?!!
LikeLike
Absolutely beautiful! Can you let me know what did you use for the crystal towers. I know you did a follow up piece on the Frozen cake here, but still was not to clear for me. Please let me know.
LOVE THE CAKE! Great job.
LikeLike
Because re-creating the ice castle pictured HERE was beyond my capabilities…as in I had NO idea where to start…I decided to go with an “illusion” or reasonable facsimile. Something abstract.
The first thing I thought of was the clear plastic pillars I’ve used to separate wedding tiers, pictured in the post above. They are hollow and can be filled with candy, sugar, tissue paper…I went with tiny pieces of the broken hard candy. I stopped the bottom of the pillar up with a ball of fondant to keep the candy from falling thru, then filled them with the candy from the top. I inserted a wooden skewer pointy end first into the fondant ball and pushed it up about 1″ into the pillar…the skewer will stablilize the pillar once you put it on the cake by pushing the bottom of the skewer into the cake. You may have trim the skewer a bit, depending on how long it is and how tall your cake is. I inserted pillars in a haphazard design, avoiding “balance”, altho the ice castle appears to be symmetrical. And I went with odd number of pillars..another quirk of mine…odd number of flowers in a vase, odd number of picture frams on the wall….you know what I mean?
You can find the pillars at a cake supply store, Hobby Lobby, Michaels or order online from Wilton.com. You can see them in the 1st and 4th pics in the post.
Another possibility would be glass candle sticks? They would be heavier and harder to stabilize but would give you the same effect.
One of my readers did her version and used hard candy pops/twizzles/rockets…not sure what they’re called but I’ve seen the in mall candy shops and online. They’re shown HERE.
I’ve been trying to figure out how to pour hard candy in the shape of the castle but having little experience in that art, am clueless!!
Hope this helps!!!?
LikeLike
Pingback: More Frozen cakes (but not frozen!) | Everything You Ever Wanted to Know About Country Life
Pingback: Need a makeover? | Everything You Ever Wanted to Know About Country Life
Pingback: Frost flowers…Too cool not to share | Everything You Ever Wanted to Know About Country Life